How to Import Presets in Adobe Lightroom in 2024?
Adobe Lightroom presets are powerful tools for streamlining photo editing workflows, helping to achieve stunning results with minimal clicks. No matter whether you use Lightroom Classic, Lightroom CC, Lightroom Mobile on Android or iOS, or Lightroom Classic Mobile for Android or iOS, installing and importing presets should be a straightforward process across each version of Lightroom. This article outlines steps for each version so you can take full advantage of your presets across platforms.
Installing and Importing Presets On Lightroom Classic
Adobe Lightroom Classic is the preferred choice for professional photographers and advanced editors. Adobe Lightroom Classic supports presets in the.XMP file format. Below are three methods to guide you through the process:
Method 1: Installing Presets Using the “Import Presets” Option
- Locate Your Presets: Begin by having the Lightroom presets you intend to install ready on your computer.
- Open Lightroom Classic: Launch Lightroom Classic and ensure you’re using the latest version for optimal features.
- Navigate to the Develop Module: Head to the “Develop” module, located in the top-right corner of the interface.
- Access the Presets Panel: On the left side, find the “Presets” panel. If not visible, press the “P” key to toggle it.
- Use the “+” Icon: Click on the small “+” icon within the “Presets” panel, revealing a menu. Choose “Import Presets.”
- Locate and Select Preset: A window will appear; navigate to your preset files (usually in .xmp or .lrtemplate formats), select them, and click “Import.”
- Organize Your Presets: After import, organize presets into folders based on themes or styles for easy accessibility.
- Apply Presets: With presets now in Lightroom, apply them to photos in the “Develop” module by clicking on your desired preset.
Method 2: Drag and Drop Presets
- Have Your Presets Ready: Ensure your preset files are accessible on your computer.
- Open Lightroom Classic: Launch Lightroom Classic and head to the “Develop” module.
- Access the Presets Panel: Find the “Presets” panel on the left side, or press “P” to toggle it.
- Open Preset Folder on Computer: Locate your preset files in a folder on your computer.
- Drag and Drop: Simply drag the preset files from your computer folder into the “Presets” panel in Lightroom Classic.
- Organize and Apply: Organize your imported presets into folders within Lightroom Classic and start applying them to your photos.
Method 3: Importing Presets via Lightroom Classic Preferences
- Prepare Your Presets: Have your preset files accessible on your computer.
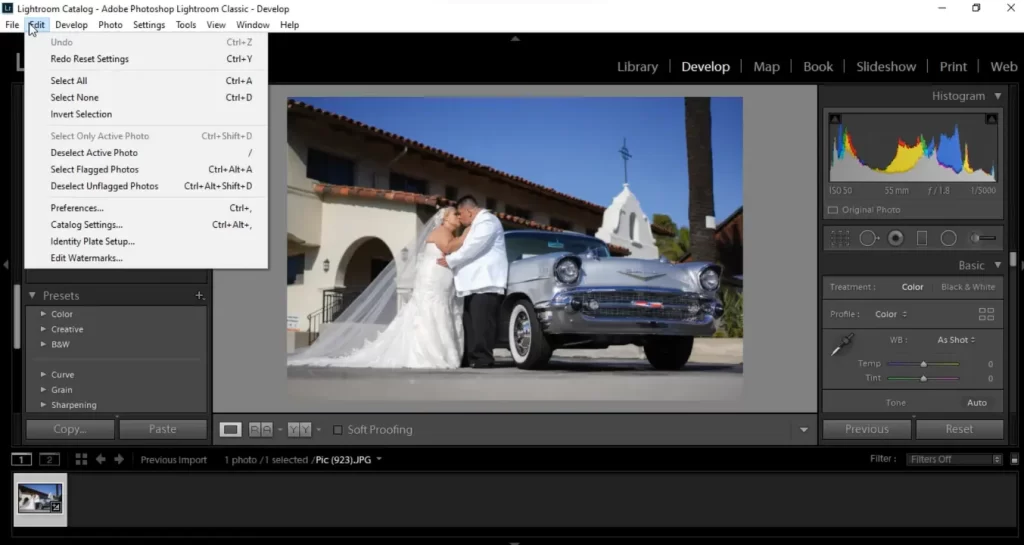
- Open Lightroom Classic: Launch Lightroom Classic and go to the “Edit” menu (Windows) or “Lightroom Classic” menu (Mac).
- Access Preferences: Select “Preferences” (Windows) or “Lightroom Classic” > “Preferences” (Mac).
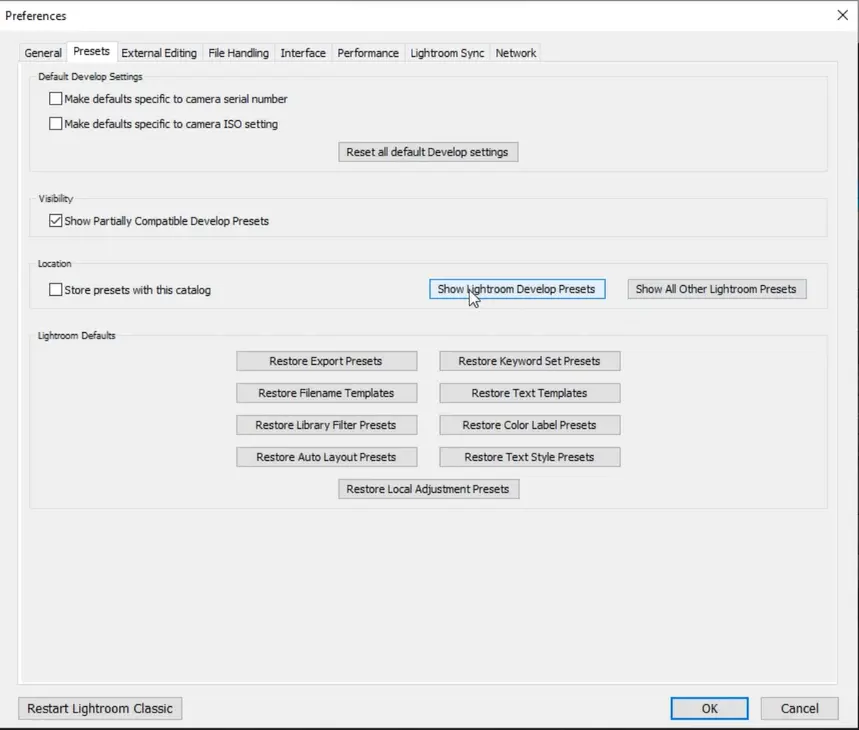
- Navigate to Presets Tab: In the Preferences window, go to the “Presets” tab.
- Choose “Show Lightroom Develop Presets”: Check the box that says “Show Lightroom Develop Presets.”
- Click “Show All Other Lightroom Presets”: Click the button that says “Show All Other Lightroom Presets” to open the folder.
- Copy Preset Files: Copy your preset files into the “Settings” folder that opens.
- Organize and Apply: Back in Lightroom Classic, organize and apply your imported presets to enhance your photo editing.
By following any of these methods, you’ll effortlessly incorporate presets into Lightroom Classic, unleashing a world of creative possibilities for your photo editing endeavors.
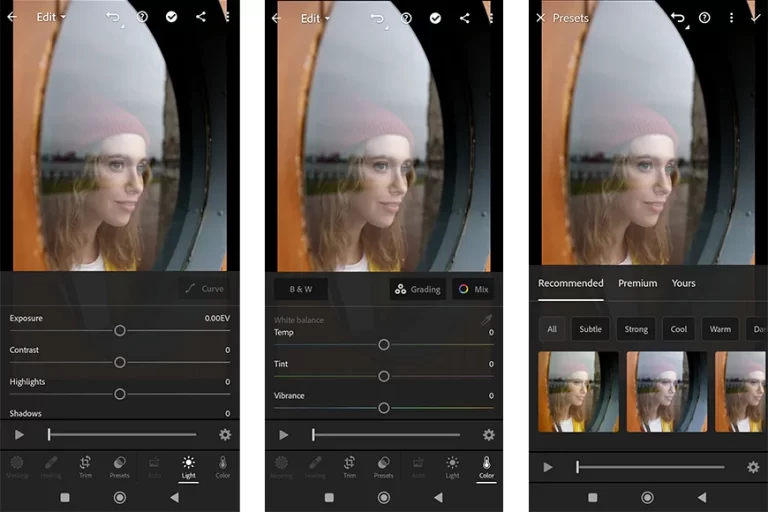
How to Import Preset in Lightroom Mobile
Improving your mobile photo editing is a no-brainer when you know how to import presets into Lightroom Mobile. Here are two of the best and easiest ways to guide you through the process:
Method 1: Synchronization with Lightroom Desktop
- Install Lightroom Desktop: Start by having Lightroom Desktop installed on your computer. Ensure you’re using the latest version for seamless synchronization.
- Open Lightroom Desktop: Launch Lightroom on your computer and sign in with your Adobe ID.
- Import Presets to Lightroom Desktop: Import the desired presets into Lightroom Desktop. You can use the methods mentioned earlier for Lightroom Classic.
- Enable Sync: In Lightroom Desktop, ensure synchronization is enabled. Click on the cloud icon, and if it’s grey, click to turn it on.
- Wait for Sync: Allow a few moments for the presets to sync with the Adobe Creative Cloud.
- Access Lightroom Mobile: Open Lightroom Mobile on your mobile device and ensure you’re signed in with the same Adobe ID.
- Find Your Presets: Once synced, your presets will appear in Lightroom Mobile under the Presets section.
- Apply Presets: Select a photo, navigate to the Presets section, and apply your imported presets effortlessly.
Method 2: Import Using DNG Files
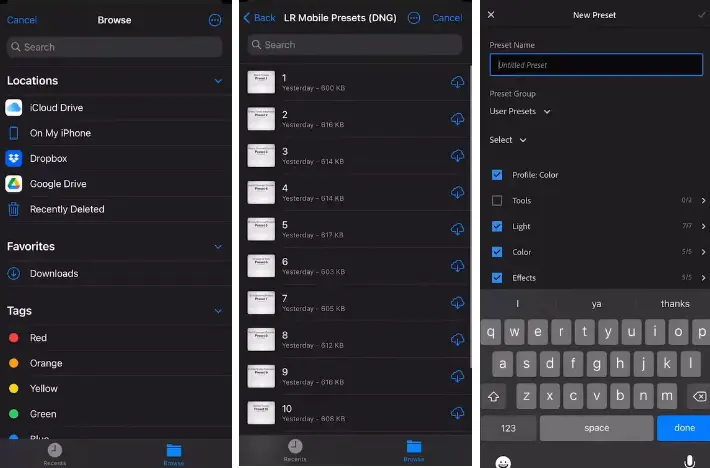
- Locate DNG Files: Have the DNG files of the presets you want to import accessible on your mobile device.
- Open Lightroom Mobile: Launch Lightroom Mobile on your device and sign in with your Adobe ID.
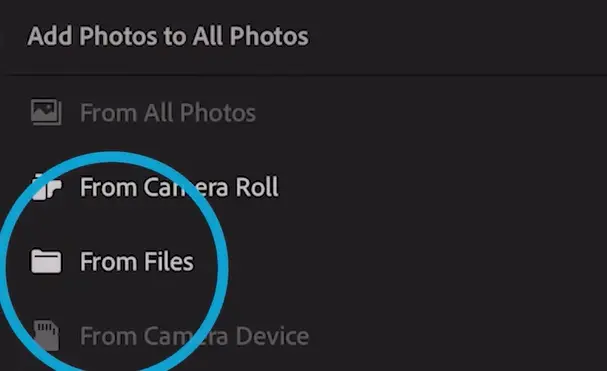
- Import DNG Files: In Lightroom Mobile, tap the “+” icon to create a new project. Choose “From Camera Roll” and select the DNG files you want to import.
- Access Presets: Once imported, open the photo associated with the DNG file. Navigate to the Presets section.
- Save as Presets: Tap the three dots (options) and choose “Create Preset.” Name your preset and save it.
- Apply Presets: With your presets saved, apply them to any photo in Lightroom Mobile with just a tap.
Both of these methods provide the flexibility to import presets into Lightroom Mobile, ensuring you have a diverse range of creative tools for photo editing on the go.
Conclusion
I hope you are now able to import your lovely photographs into Lightroom. If any of these ways seem confusing to you, choose one and go to work; if it works for you, there’s no reason to try other approaches. By the way, if you have figured out the answer, there’s no need to read the entire essay.
FAQs
Easy! Open the app, tap Presets, select “Import Presets,” and find your preset files. Done!
Simple! In Develop, click a preset—an instant style upgrade—for your photo.
Check version compatibility or restart Lightroom; sometimes they need a nudge.
In Develop, click “+,” choose “Import” Presets, and discover your hidden gems.
Tap “+,” choose “From Files,” and find XMP files. Let Lightroom work its magic.
Hit up Adobe Exchange, PresetLove, or FilterGrade, the candy stores of free presets.
Open Lightroom, go to Presets, click three dots, choose “Import Presets,” and find your CC presets easy transition.

