How to Blur Background in Lightroom in 2024
Are You Looking to Blur Your Photos Background Blur in Lightroom? Adobe Lightroom is a powerful tool for capturing stunning images with its ability to create a dreamy background blur.
In this post, we will teach you how to blur the backdrop in Adobe Lightroom Classic, which is an effective method for improving images. It explains how to add blur to each editing step in Lightroom Classic, with three options depending on the version. This serves to make subjects stand out and keeps photographers from focusing too much on their subjects, resulting in blurry shots.
Blurring the Background Using an AI Mask
You will have access to all of the new AI features if you have updated Lightroom Classic (after October 2022). Here’s a short and easy instruction for blurring the background with these new capabilities.
We’ll show you three masking solutions for highlighting the background. The first option is to mask the subject and reverse the selection. This takes a little longer. It may also require some tweaking with the brush tool. Also read: How to Import Presets in Adobe Lightroom in 2024?
The second way is significantly faster: use the AI backdrop mask. Finally, if you have an older version of Lightroom Classic, we will demonstrate the necessary brushwork and selections.
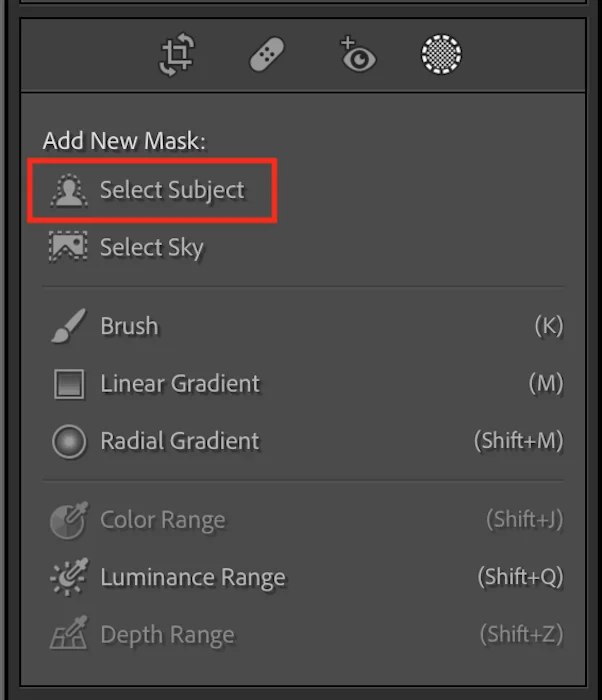
Step 1: Open the Image and Select the Masking Icon
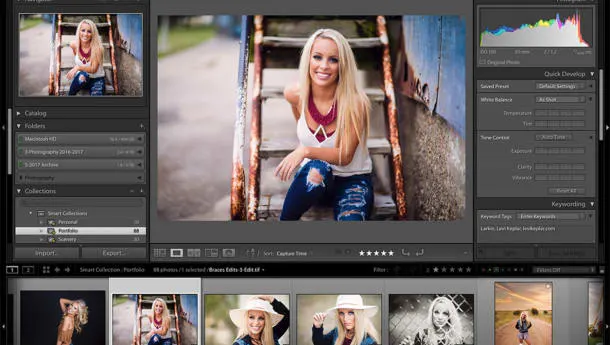
First of all, open an image in Lightroom and go to the Develop page.
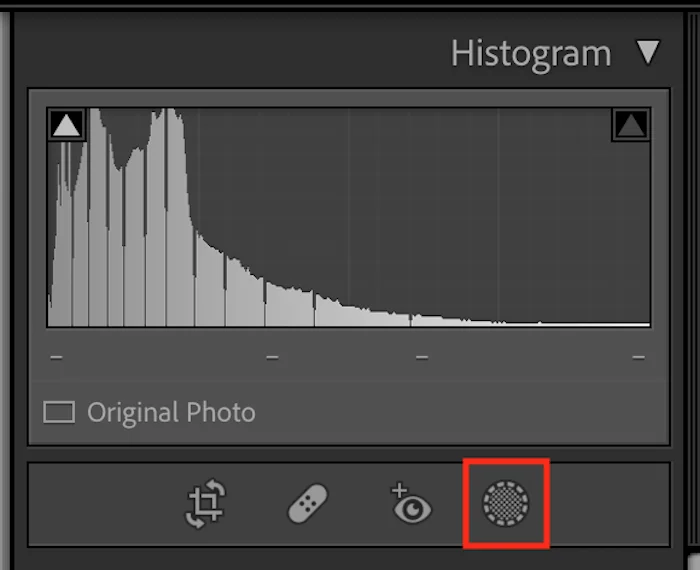
To begin, click the masking icon or press Shift + W under the main histogram to access a range of icons.
Step 2. Add a Subject Mask (Option 1)
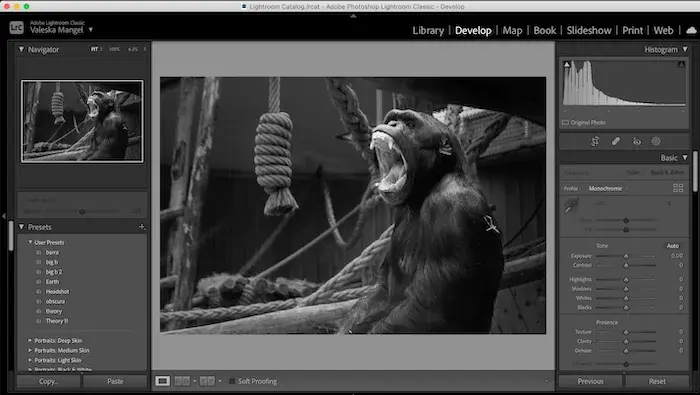
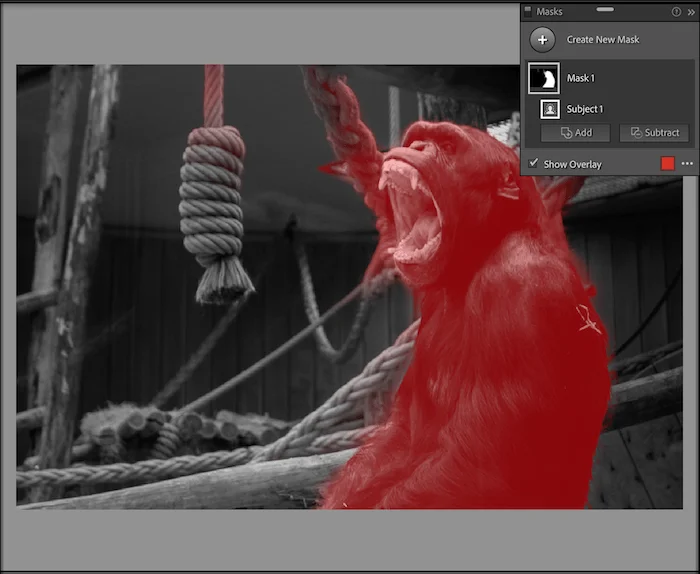
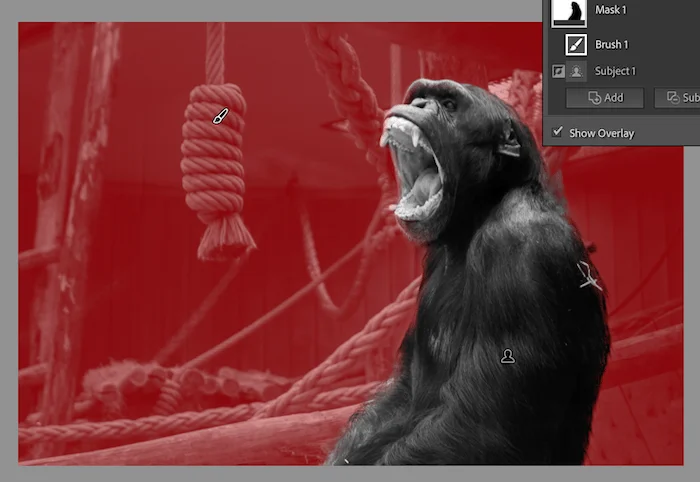
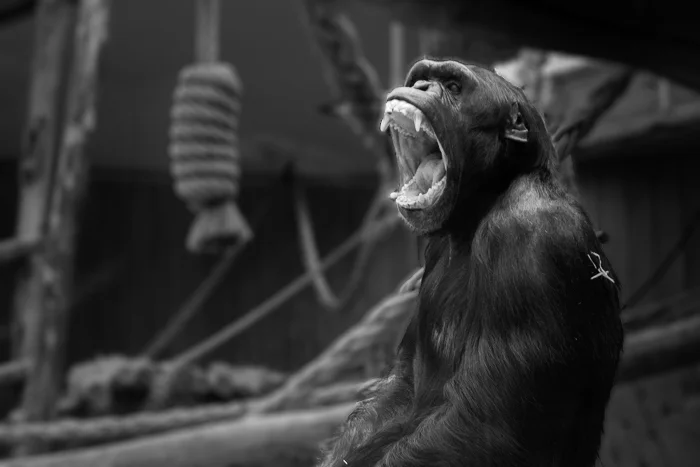
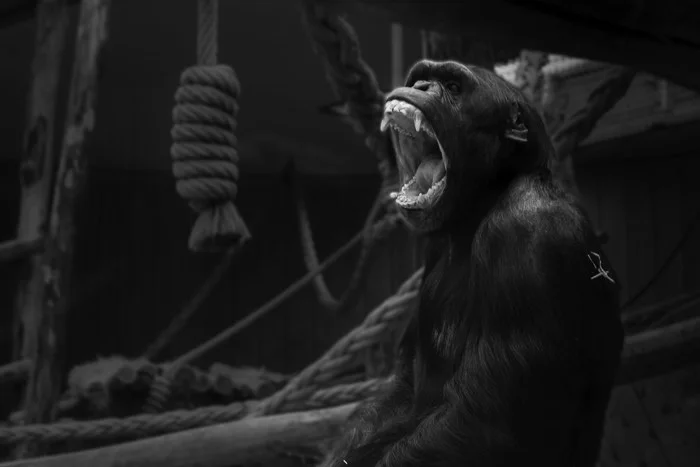
You will then be given several options for applying a mask to your image. For this example, we want to blur everything but the monkey. So, we’ll choose “Select Subject.”
This will add an AI mask to our image. Because the image I picked is black and white, it can be difficult to distinguish between the foreground and background. Surprisingly, the AI has realized that our rope is in the foreground more than the other things!
This is fantastic, but I’d like the rope to be blurred in this photograph. Here’s how to delete specific areas of your mask.
We select the “Subtract” box from our present selection. And for this strategy, I’ll show you how to use the brush tool, which is the simplest and quickest method.
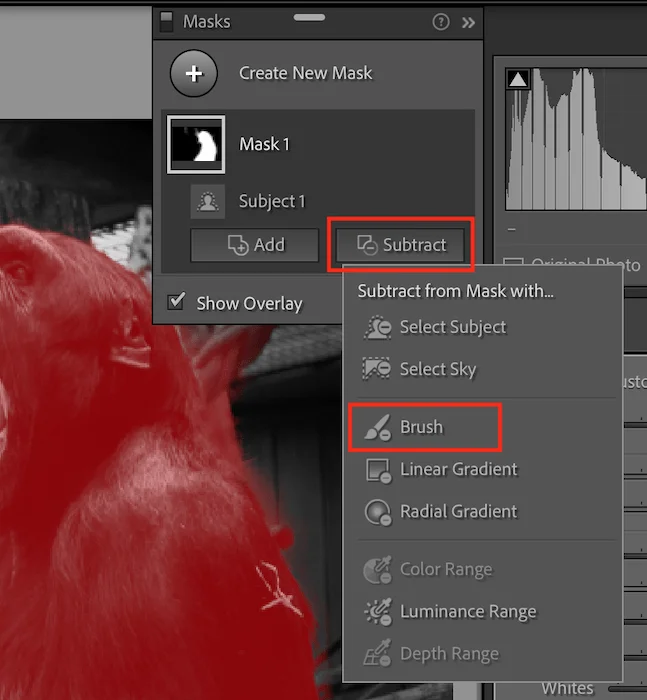
After selecting the brush tool, brush over the areas you wish to blur. Your image should look like this.

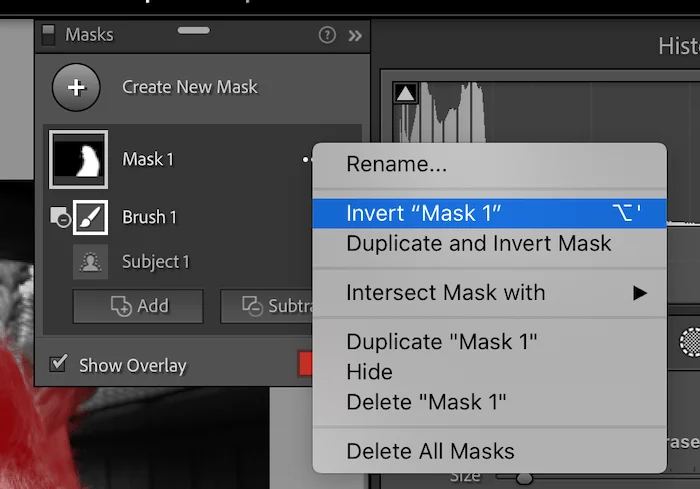
To invert your selection when your subject is fully masked, right-click on Mask 1 and select “Invert.”
Now your image looks like this:
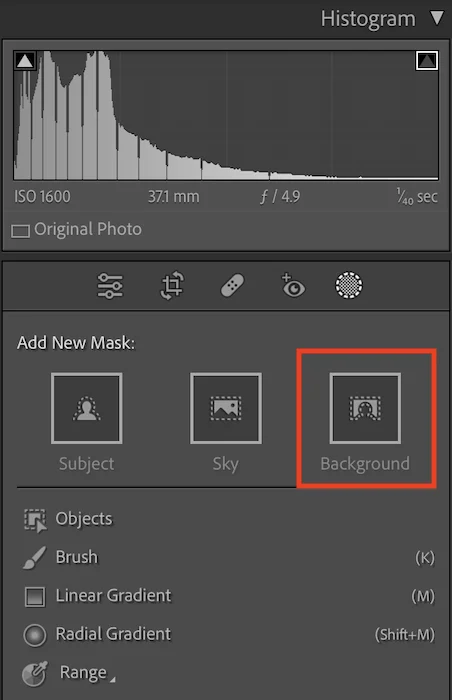
Step 2. Add a Background Mask (Option 2)
Those with the latest version of Lightroom Classic get a third option to mask the background. So click “Background.” The AI tool should select the subject automatically.
It will work the same way as the masked picture above, but it will be faster. You can also make the same adjustments to the brush if you need to.
Step 3. Applying Blur Reduce the Sharpness Slider
We’re now ready to blur your background. The Adjustments screen shows you a list of changes you can make to your mask.
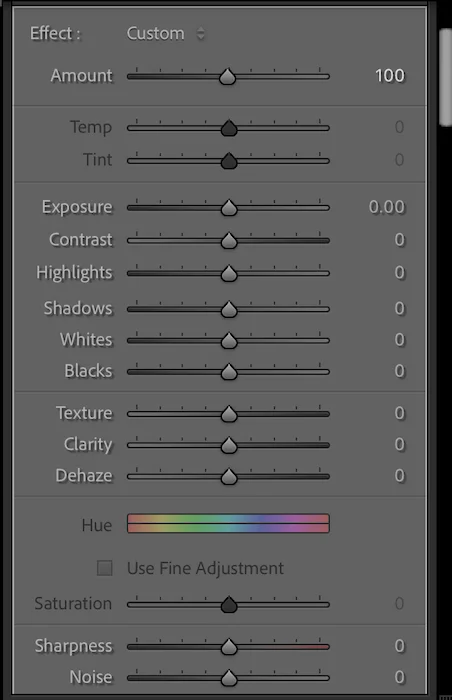
Look for the sharpness button. It is possible to change the texture and clarity to make the effect less noticeable. I’m going to move the sharpness button to the left to make the difference stand out.
Here are the final results that took me under two minutes to create!
If you don’t have the latest version of Lightroom, read these steps!
Blurring the Background Using Brush Tool
This is the third option for older versions of Lightroom that don’t have AI tools. You can give an effect to a part of your image with the brush tool.
- Make a new mask or change an old one in the Mask section of the Brush panel.
- Pick a preset or make your effect by hand in the Effect part of the panel.
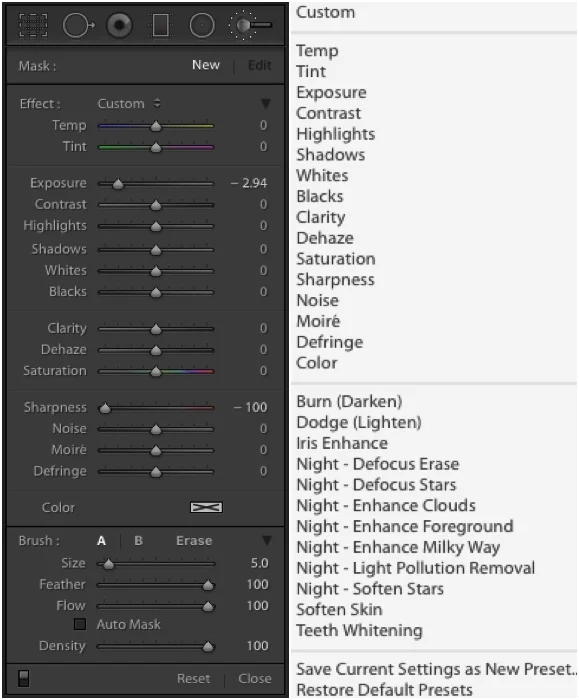
The Brush section in the panel allows you to customize effects for two brushes without impacting painted areas. You can easily modify the following brush settings:
- Size: Adjust the relative size of the brush.
- Feather: Controls the softness or hardness of the brush.
- Flow: Determines the brush strength; use values below 100 for a gradual effect buildup in the same area.
- Auto Mask: Enable a feature to help you follow borders while painting.
- Density: Establishes a maximum-strength cap for the brush.
Feel free to change these properties at any time without affecting the already-painted parts.
Step 1: Open Image and Select Brush Tool
This will be a third option for older versions of Lightroom that don’t have AI tools.
Give a part of your picture an effect with the brush tool.
Make a new mask or change an old one in the Mask section of the Brush panel.
You can pick a preset or make your effect by hand in the Effect part of the panel.
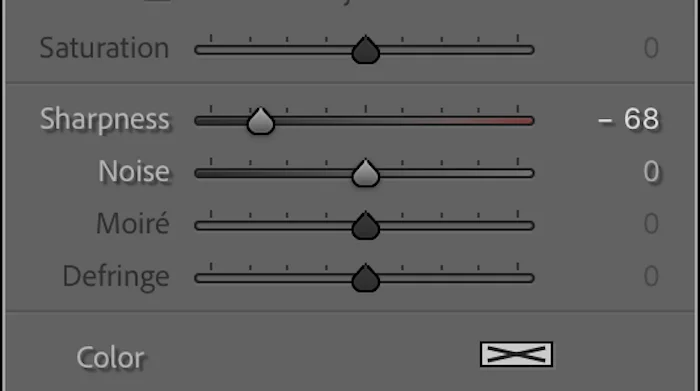
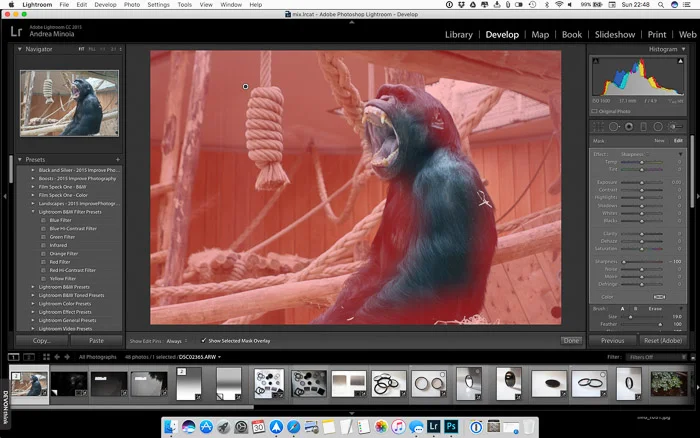
Step 2. Adjust Sharpening Slider and Paint Background
Slide the sharpness slider to -100, then paint over the backdrop. It is not necessary to be exact at this point.
To show or hide the chosen mask overlay (shown in red), press the “O” key on your keyboard. You can see better where you’re drawing this way. The brush effect is not visible in this image while the mask layer is active.
Once you’ve created a coarse mask, begin working around the edges. To fine-tune the mask edges, adjust your brush’s size, flow, density, and feathering. The auto-mask option may be useful in this situation.
Eventually, you may need to utilize the eraser brush to tidy up your subject. This guarantees that the blur effect is applied just to the backdrop.
For genuine blur, keep in mind that the degree of blur gradually rises as you go away from the focal plane. All items on the focus plane must remain crisp.
After the paint-and-erase step, you’ll have a decent mask.
Step 3. Increase the Amount of Blur
Setting the sharpness to -100 resulted in a small bit of lens blur. The good news is that Lightroom allows you to duplicate your adjustment brush by right-clicking on the brush marker and selecting “Duplicate.”
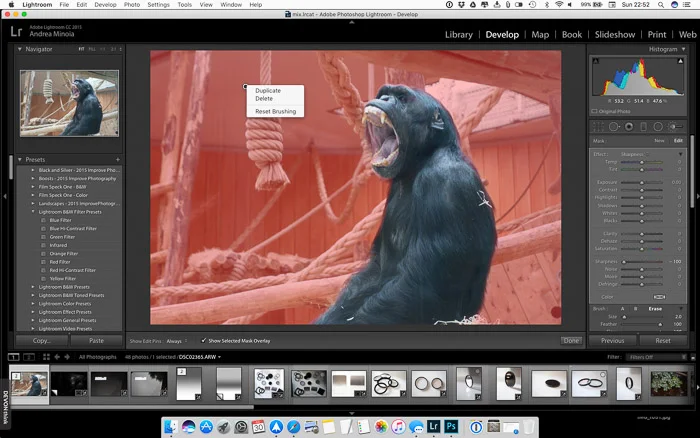
This new brush uses the same parameters and mask as the previous one. Make sure all of the sliders are set to 0, except sharpness, which should be -100.
From now on, duplicate the brush as many times as necessary to apply the blur and achieve the desired effect. However, having too many correction brushes in an image can cause Adobe Lightroom to slow down.
Step 4. Final Retouches
After blurring the backdrop, duplicate the brush one more time. To enhance the blur, gently reduce the clarity (reset the sharpness to 0).
Next, utilize the global settings or other selective adjustment tools to make any final edits to your image.
Once you’re happy with your image, the only thing left to do is export it and share the results of your labor.
Conclusion
We hope we’ve helped you use Lightroom to make a nicely blurred background. Check out our revised Effortless Editing in Lightroom course to learn even more about Adobe Lightroom!
However, keep in mind that using the widest aperture can help reduce the depth of the field. This allows you to achieve an even separation between your topic and the background without the need for editing!